This summer you can have fun in the sun and learn a little about science, technology, engineering, art and math (STEAM) at the same time. Here are some entertaining and easy science experiments for kids and adults alike to fill long, sunny days (and some indoor activities for the rainy ones).
Download your Honourary Scientist certificate when you're done!
Disclaimer
While every reasonable effort is made to provide experiments that are safe, adult supervision is always recommended when experiments are performed. Safety gear, such as gloves and glasses, may be required.
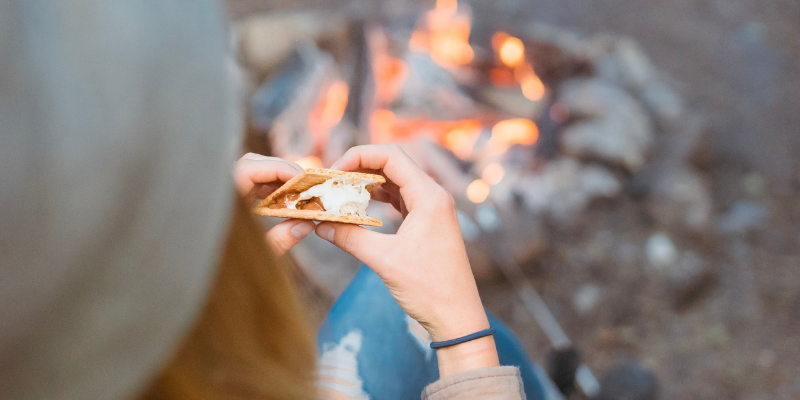
Harness the Sun: Solar S’mores Experiment
(Adapted from How To Make A Solar Oven - Little Bins for Little Hands)
Did you know you can use the sun to bake? It’s true! Try your hand at creating a solar oven and make s’mores without the campfire.
Safety Notice! Adult supervision and assistance may be required for cutting and use of the hot glue gun.
You’ll need
- Cardboard pizza box
- Black construction paper
- Aluminum foil
- Plastic wrap
- Skewers
- Glue gun and glue
- Scissors or box cutter
- Ruler
- Markers
- S'mores fixings (e.g., marshmallows, graham crackers, chocolate squares)
Instructions
- Using your ruler and marker, make a square on the lid of the pizza box, leaving about 2 inches from the edges of the box.
- Using the scissors or box cutter, carefully cut the square out of the lid.
- Wrap the square in aluminum foil and glue it down.
- On the bottom of the open box, glue in the black construction paper.
- On the inside of the box lid, carefully glue plastic wrap over the opening.
- Prepare your smores. Place graham crackers on the black construction paper, then layer each cracker with a square of chocolate and a marshmallow.
- Close the lid, and carefully position the foil wrapped square onto the top part of the opening, using the skewers and glue to hold it in position.
- Place the box in the sun for an hour, and watch the sun melt your s’mores.
- When gooey, open the box and place a graham cracker on top of each marshmallow and enjoy!
Here's the science behind your solar oven! The solar oven uses the sun’s energy to heat food. The foil reflects the sun’s rays into the box. The plastic wrap helps trap the heat in the oven while allowing the sun to shine through. The black construction paper also absorbs the sun’s heat and increases the temperature inside the box.
Did you know? SRC works with renewable energy, including solar. We help companies and organizations integrate renewable energy into their operations.
Bubble fun: Make your own bubble maker
Have you ever created a square bubble or a triangle bubble? You can! Discover how bubbles form with SRC and Wowl STEAM Lab by crafting these fun bubble makers and learning about geometry and surface tension at the same time.
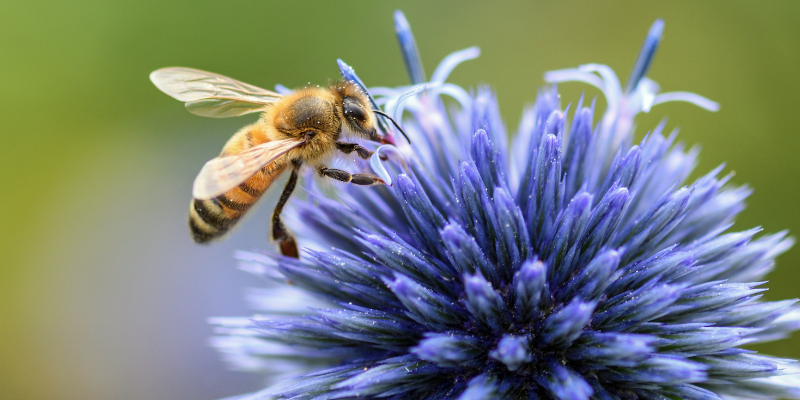
Bee a Good Friend: Bee Bath Experiment
(Adapted from Make a Bee Bath - Garden Therapy)
Did you know that you can help bees and other pollinators stay cool and hydrated in the summer? Make a bee bath to help our fuzzy, flying friends as they pollinate our flowers, fruits, veggies and more.
Safety Notice! Adult supervision and assistance may be required for use of the hot glue gun and shellac.
You’ll need
- Plant pot with a separate saucer (we recommend terracotta pots, easily found at your local hardware, garden supply, craft or discount store)
- Non-toxic acrylic paints
- Clear-spray shellac (optional—it will help preserve the paint longer)
- Paint brushes
- Newspaper
- Water and cups for cleaning brushes
- Paper towel
- About five small stones per pot
- Glue gun and glue
- Water
Instructions
- Spread the newspaper on your work area and fill cups with water.
- Paint the outside of your plant pot however you like. The plant pot is the stand for your saucer. When changing colours, clean your brushes in water and dry with paper towel. Do not paint or spray the inside of the saucer.
- Let the paint dry thoroughly and with adult help, spray with shellac. Let dry.
- When dry, turn the plant pot over so the bottom is facing up. Glue the bottom side of the saucer to the bottom of the pot.
- Place the pot with saucer up into your garden near your plants with some shade.
- Place the stones inside the saucer and add water, ensuring the water does not cover the stones entirely.
- Bees, butterflies and other pollinators will land on the rocks to sip the water.
- Change the water daily and clean the bath weekly.
- Enjoy watching the bees cool off!
Here's the science behind your bee bath! Bees (and other pollinators) have an important job to do. They transfer pollen into flowers so those plants can produce both seeds and fruit. Pollinators help produce one out of every three bites of food our planet grows. Bees not only need to stay hydrated to do their job, but they also need water to make honey, keep their hives cool and feed their babies.
Did you know? SRC works in agriculture and biotechnology, helping to support sustainable agriculture and preserve biodiversity.
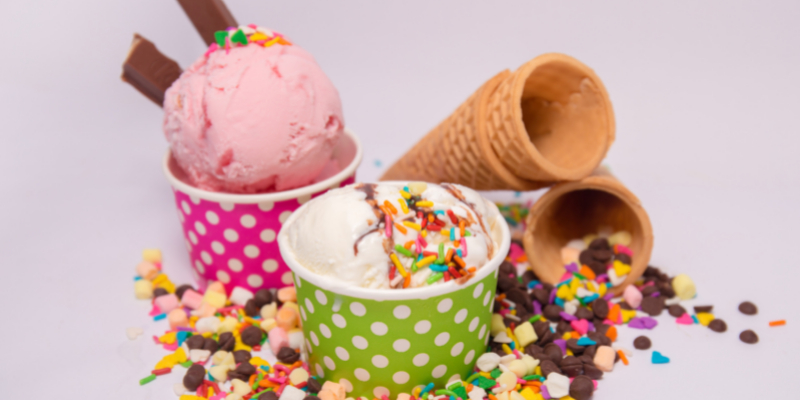
Cool Down with Chemistry: Ice-Cream-in-a-Bag Experiment
(Adapted from Ice Cream in a Bag for Kids - Little Bins for Little Hands)
There is nothing like ice cream on a hot summer day. Have you ever tried making it yourself? It’s easy with this ice-cream-in-a-bag experiment.
Safety Notice! Wear gloves to protect your hands when shaking the bags.
You’ll need
- 1/2 cup half-and-half
- 1/4 tsp vanilla (or any type of extract, like peppermint)
- 1 tbsp sugar
- 3 cups ice
- 1/3 cup kosher or rock salt
- Large and medium freezer bags
- A pair of gloves to handle cold freezer bags
- Optional: chocolate syrup, sprinkles
Instructions
- Place the ice and salt in a large freezer bag.
- In a medium freezer bag, add the half-and-half, vanilla and sugar. Ensure the bag is sealed well.
- Place the medium bag of ingredients inside your larger bag and seal tightly.
- With your gloves on, shake the bags for approximately five minutes so the ingredients turn into a solid. You may need to add more ice and salt and shake an additional five minutes if the ice cream does not harden easily.
- Grab a spoon and enjoy with your favourite ice cream toppings!
Here's the science behind your homemade ice cream! Water freezes at 0 degrees Celsius. Adding salt to the ice lowers the temperature where water freezes, and the ice will begin to melt as the ice cream starts to freeze. Shaking the bags allows the mixture to freeze more easily. This experiment also shows how a liquid can become a solid—an example of a reversible change because when the ice cream melts, it goes back to being a liquid.
Did you know? SRC conducts chemistry experiments every day – our Environmental Analytical Laboratories is one of the most complete analytical chemistry labs in Canada.
Looking for more experiments? Visit our growing library to continue the fun!
This post was written by former SRC employee, Brook Thalgott.
